The rising of the Milky Way is perhaps one of the most beautiful phenomena one can witness. A white, hazy band of light arches across the night sky, in a dazzling display of cosmic radiance— the kind of magic that leaves us forever enchanted and amazed. For stargazers, it’s a moment of celestial splendor and, for photographers, it’s a kind of spiritual moment when they are at the peak of their creative madness. Me? I am just a dreamer! Photographing the Milky Way is not as grueling as it may seem. However, it’s often impossible to get the entire arch into one shot, or to do so without problematic distortion. Panoramas solve those problems. Although they aren’t as simple as they may seem, panoramas aren’t that difficult either. All it takes is proper planning, the right set of gear and a little push. And, of course, composition is everything if you want your image to stand out from the crowd.

Planning

I plan most of my shoots using the PhotoPills app and Google maps. There’s already a ton of articles on the web on how to plan Milky Way shoots. But, in my opinion, it’s every bit as important to scout the location and get familiar with the area before heading out to shoot in the dark. I do this for three reasons. One, it saves time when the Milky Way is only visible for a short time during the night. Two, knowing all the elements I could include in my composition brings out my creativity. And three, I want to know where the risks are before venturing out in the dark. As they say, it’s much better knowing than being ignorant. The Milky Way arch may appear at a high inclination or low in the night sky, depending on the time of the night and year you are shooting. If you are photographing the arch, the ideal time would be when it’s still low in the sky. When it is at its zenith, it can get tough to capture the full arch because you will need multiple rows of images to compose the whole scene in your panorama.

Tips and Tricks:

Always use a sturdy tripod and make sure that the tripod head is leveled to the ground, so that it’s easier to pan across the arch. For even better results, use a good tracking mount, such as Sky-Watcher Star Adventurer motorized star tracking mount, or take multiple images so that you can stack them together in post for noise reduction. I compose my vertical shots so they overlap each other by at least 20-30 percent. Panorama stitching programs found in programs such as Lightroom, Photoshop, or PTGui can seamlessly merge all the images with little manual effort. A headlamp with a red light is also crucial. It allows you to make adjustments to your gear or composition without losing your night vision. And most importantly you are not flooding the area with other bright lights when there are other photographers around. A Milky Way arch panorama can very well be composed with 4 to 5 single-exposure images, depending on what landscape elements you want to include in your final image. Stacking multiple images helps with reducing noise and bringing out the dust and gas clouds in the Milky Way and it’s the most commonly used technique when photographing dark sky objects. Adding more images for stacking means more exposure time. For example, 5 frames of 10 seconds exposure will result in 50 seconds total exposure time, which would have caused star trails if a static camera was exposed for that long on a single frame. For optimal image quality, the longer the exposure time the better. One could go as long as 10 to 15 minutes in exposure time, but the positions of the stars will shift in each frame and inclination of the Milky Way will also change. This could cause problems aligning and stacking in post. That’s where a tracking mount can help. A camera mounted on a tracker rotates along the Right Ascension (RA) axis when it is aligned with the North star or the Polaris and achieves a long exposure time in one frame, resulting in a low-noise image without star trails. However, that causes the foreground to go blur. For that reason, I usually shoot my foreground image(s) separately. Then blend in the foreground and the sky together into a final image. Whether you use single-exposure images or stacks of images, the possibilities are endless. Be creative!

Midnight in Maine!

The opening image in this article shows the glorious arch of the Milky Way, as seen from the Pemaquid Point Lighthouse in Maine. At midnight and long after, in the haze of the sky, millions of stars glittered in startling colors. Standing at the edge of the sea stack, I witnessed the Milky Way arching across the night sky with all the blazing stars shimmering in its cosmic clouds. It was glorious! Like a painting on a big canvas of a night sky with luminescent brushstrokes in shades of blue.

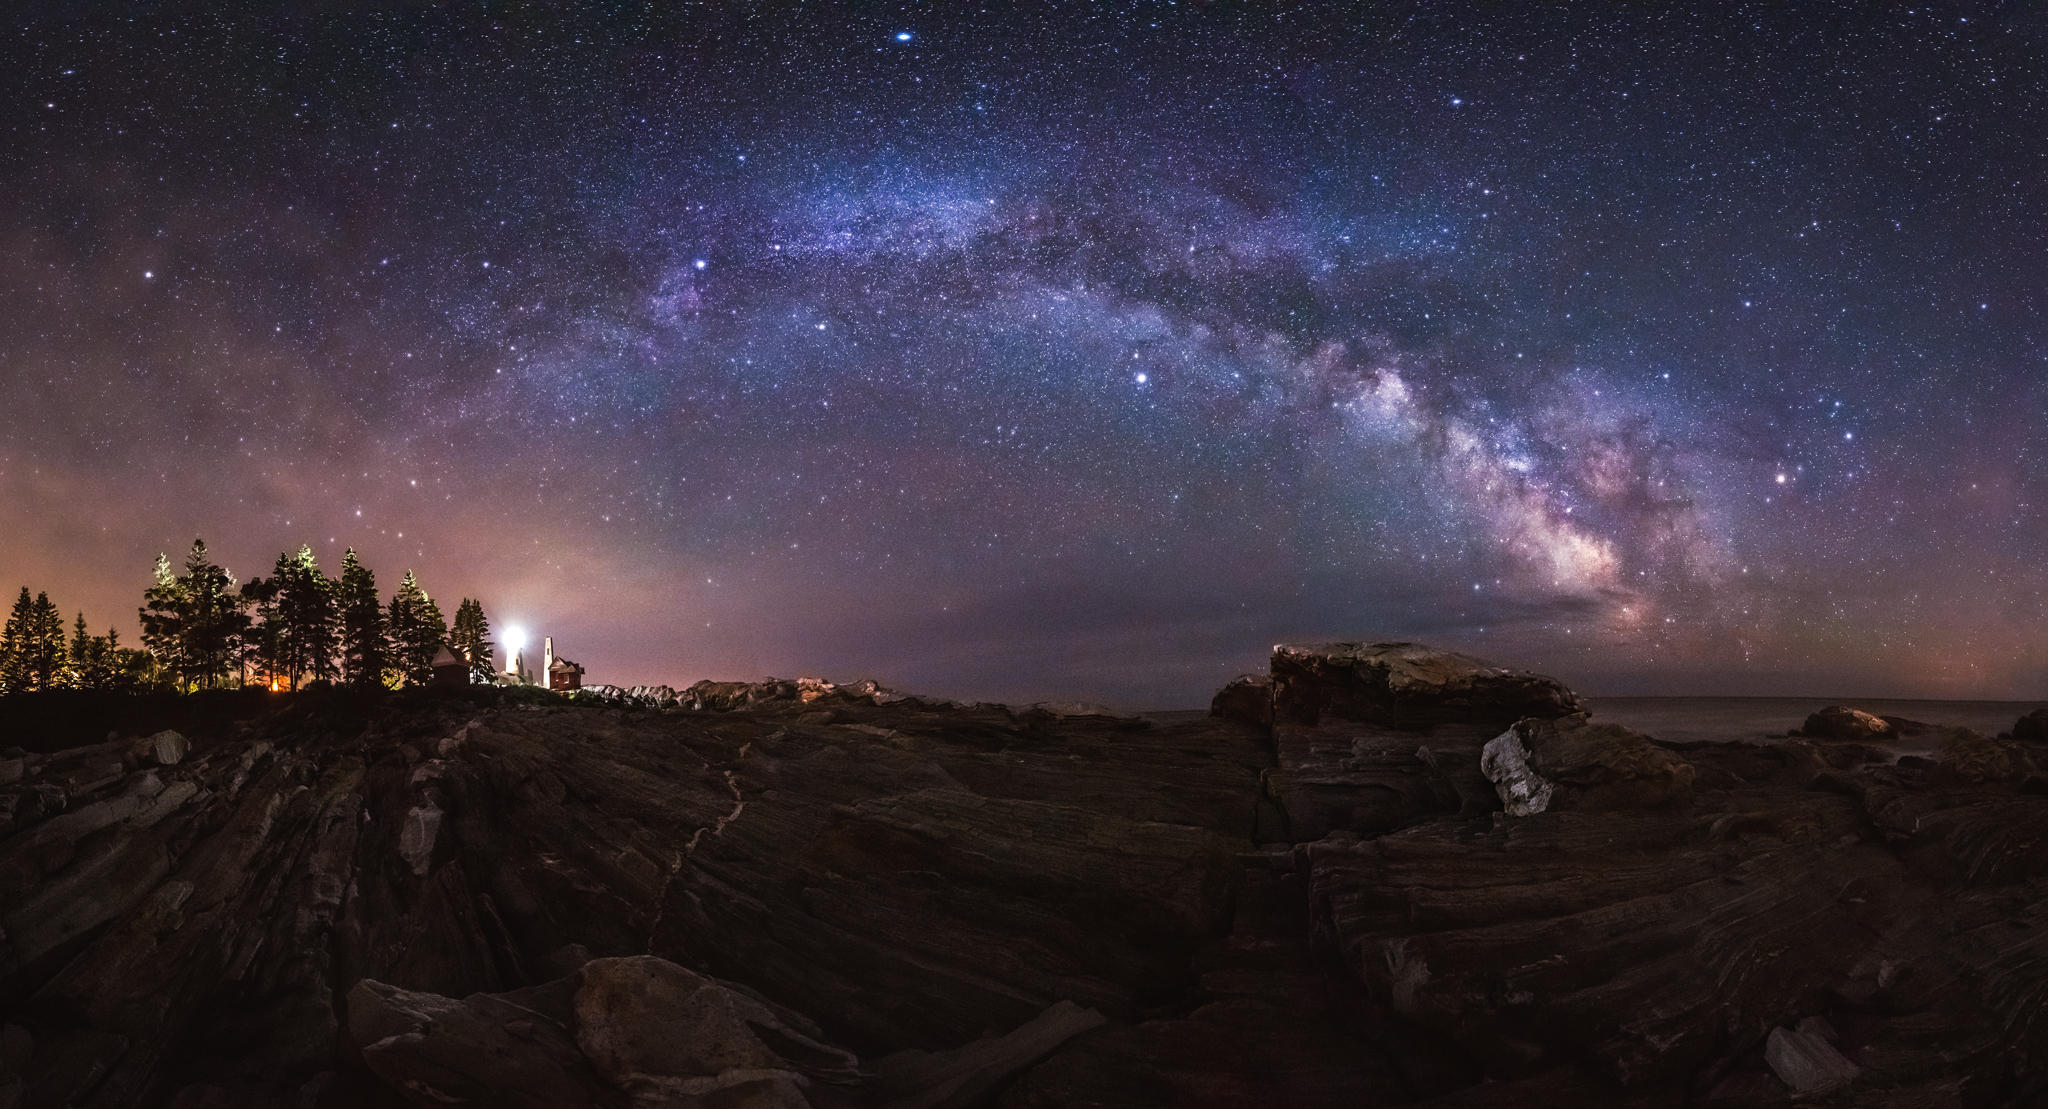
Pemaquid Point Lighthouse. Twenty images stacked and blended together using Lightroom and Photoshop. Nikon D810, Nikkor 14mm-24mm at 14mm, 15 seconds, f/2.8, ISO 8000. 

Radiant Sheild!

Night surrounded me as I was traipsing towards the Devil’s Bridge in Sedona, Arizona. The sound of its name sent shivers down my spine. I wondered why would they name it Devil’s something for the natural arch is so gorgeous. One look at the sky, and all the devilish thoughts abated in the face of boundless dark and the silhouettes of bluffs and cliffs against the star-drenched sky. Mars came peeping through Capitol Butte and Jupiter shone like a diamond. The most magnificent of all these elements was the glorious arch of the Milky Way. It appeared as if Mother Earth wielded a shield to protect itself from the dark lords.

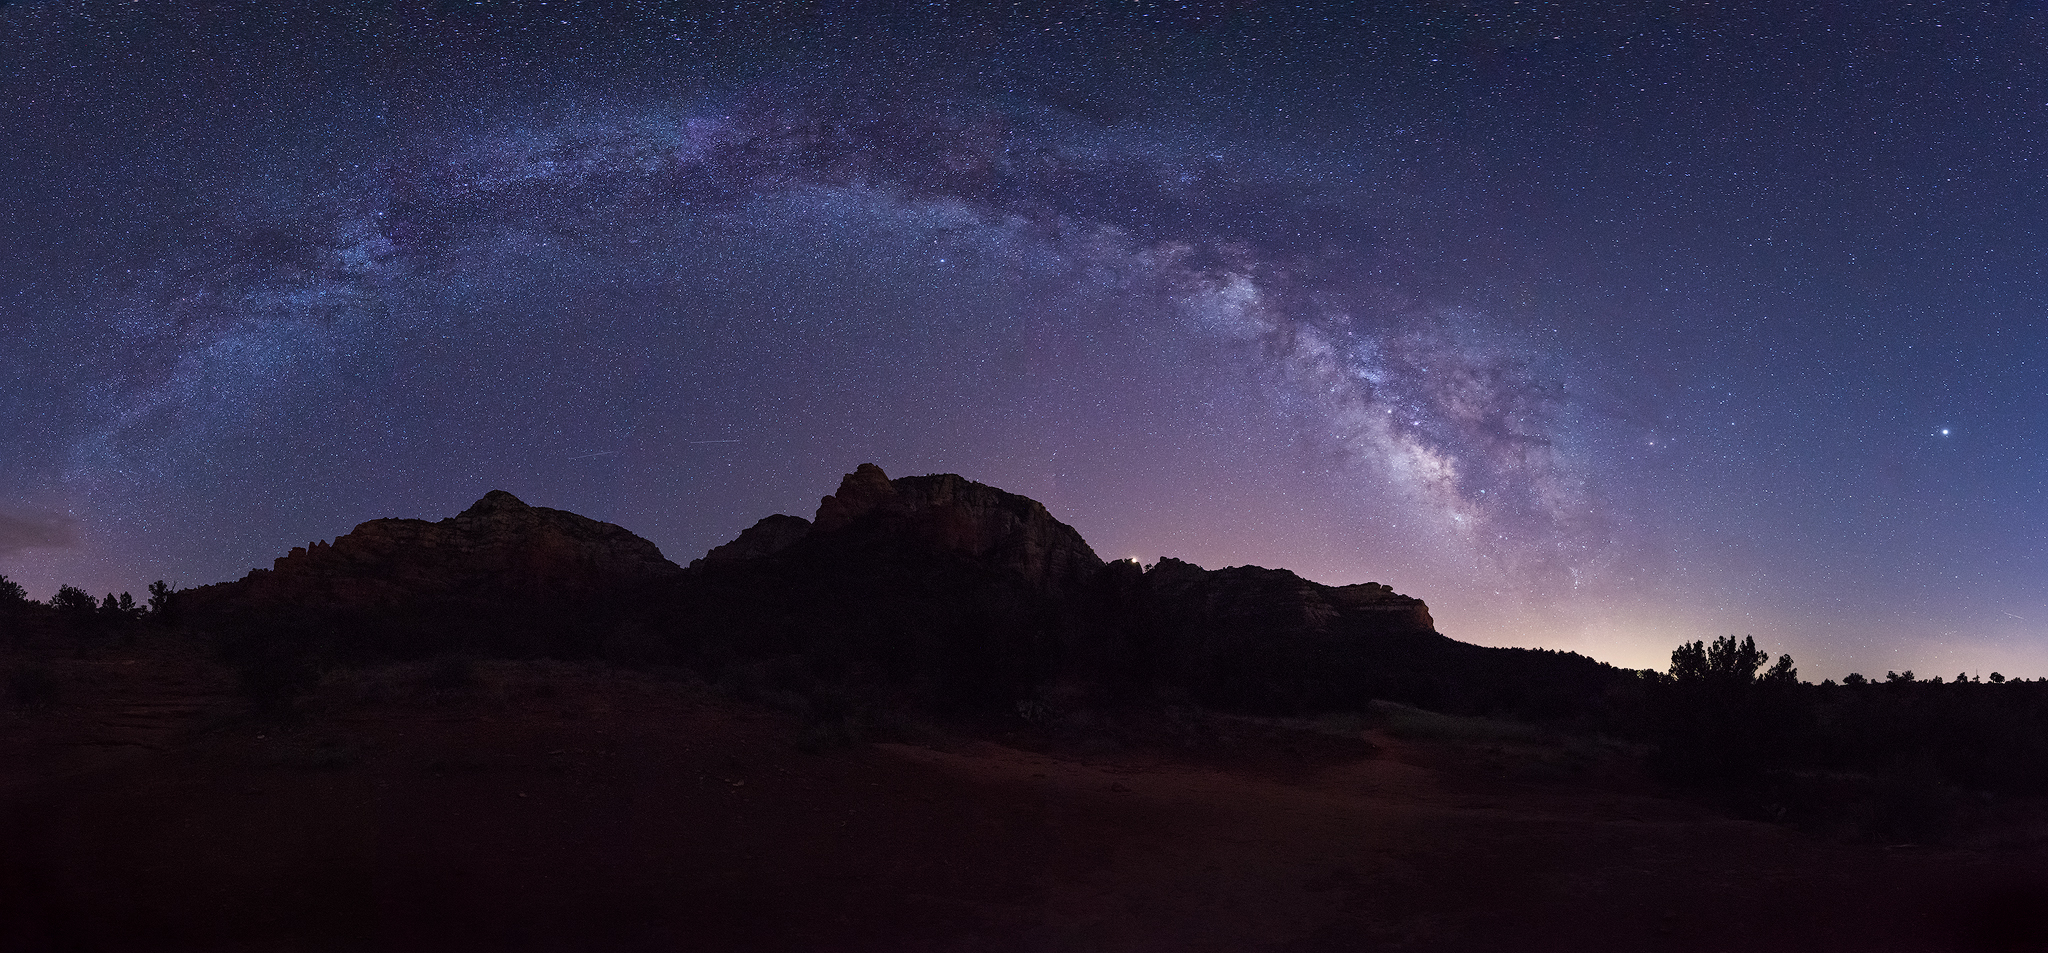
Panorama of 11 vertical images shot with Nikon D810, Nikkor 14-24mm at 14mm, f/2.8, ISO 8000.

Musa Galactica!

They say Arizona is a paradise for astro-photographers. Flying high on the wings of anticipation, I have never been this sanguine about photographing the Milky Way. It’s like a muse for me…a Musa Galactica, so to speak. At Sedona, somewhere down the Bell Rock Trail, I was spellbound at the spectacular sight of this sky river rising in between Courthouse Butte and Bell Rock. All the stars suddenly appeared closer than ever before. It was like meeting a long due dream. A Galactica Dream to savor.

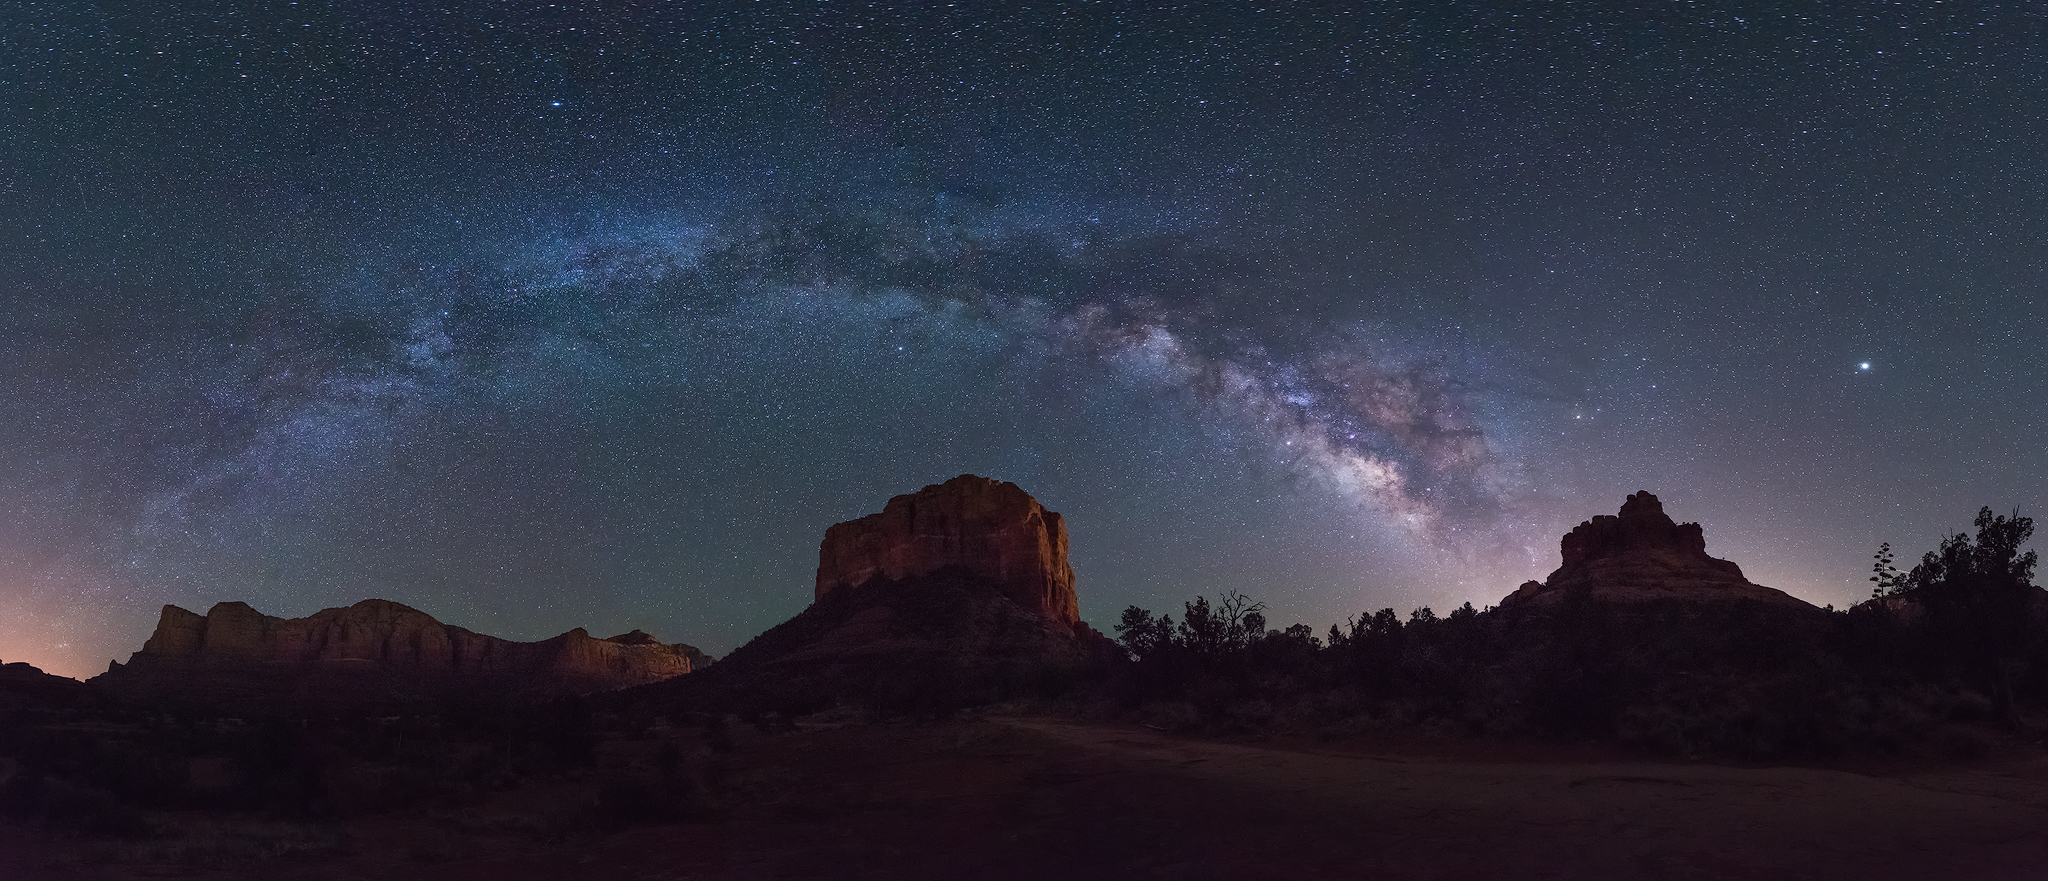
This is a panorama of 12 vertical images shot with Nikon D810, Nikkor 14-24mm at 14mm, 15 seconds, f/2.8, ISO 8000. I used Lightroom Photo Merge to create this panorama.

Symphony of Celestial Splendor

Exploring Arches National Park in Utah was a rewarding experience for me. This solemn landscape, where rock meets the sky, offers unique perspective for photographing the night sky. The galactic center of the Milky Way arches over the arches. Arches National Park was designated as an International Dark Sky Park in 2019 by International Dark-Sky Association, and most nights are characterized by clear skies filled with celestial wonders. This was shot from the trail that leads to Double Arch. The glorious arch of the Milky Way arching over the desert landscape like a perfect symphony in motion. And when the sun rises, the music fades.

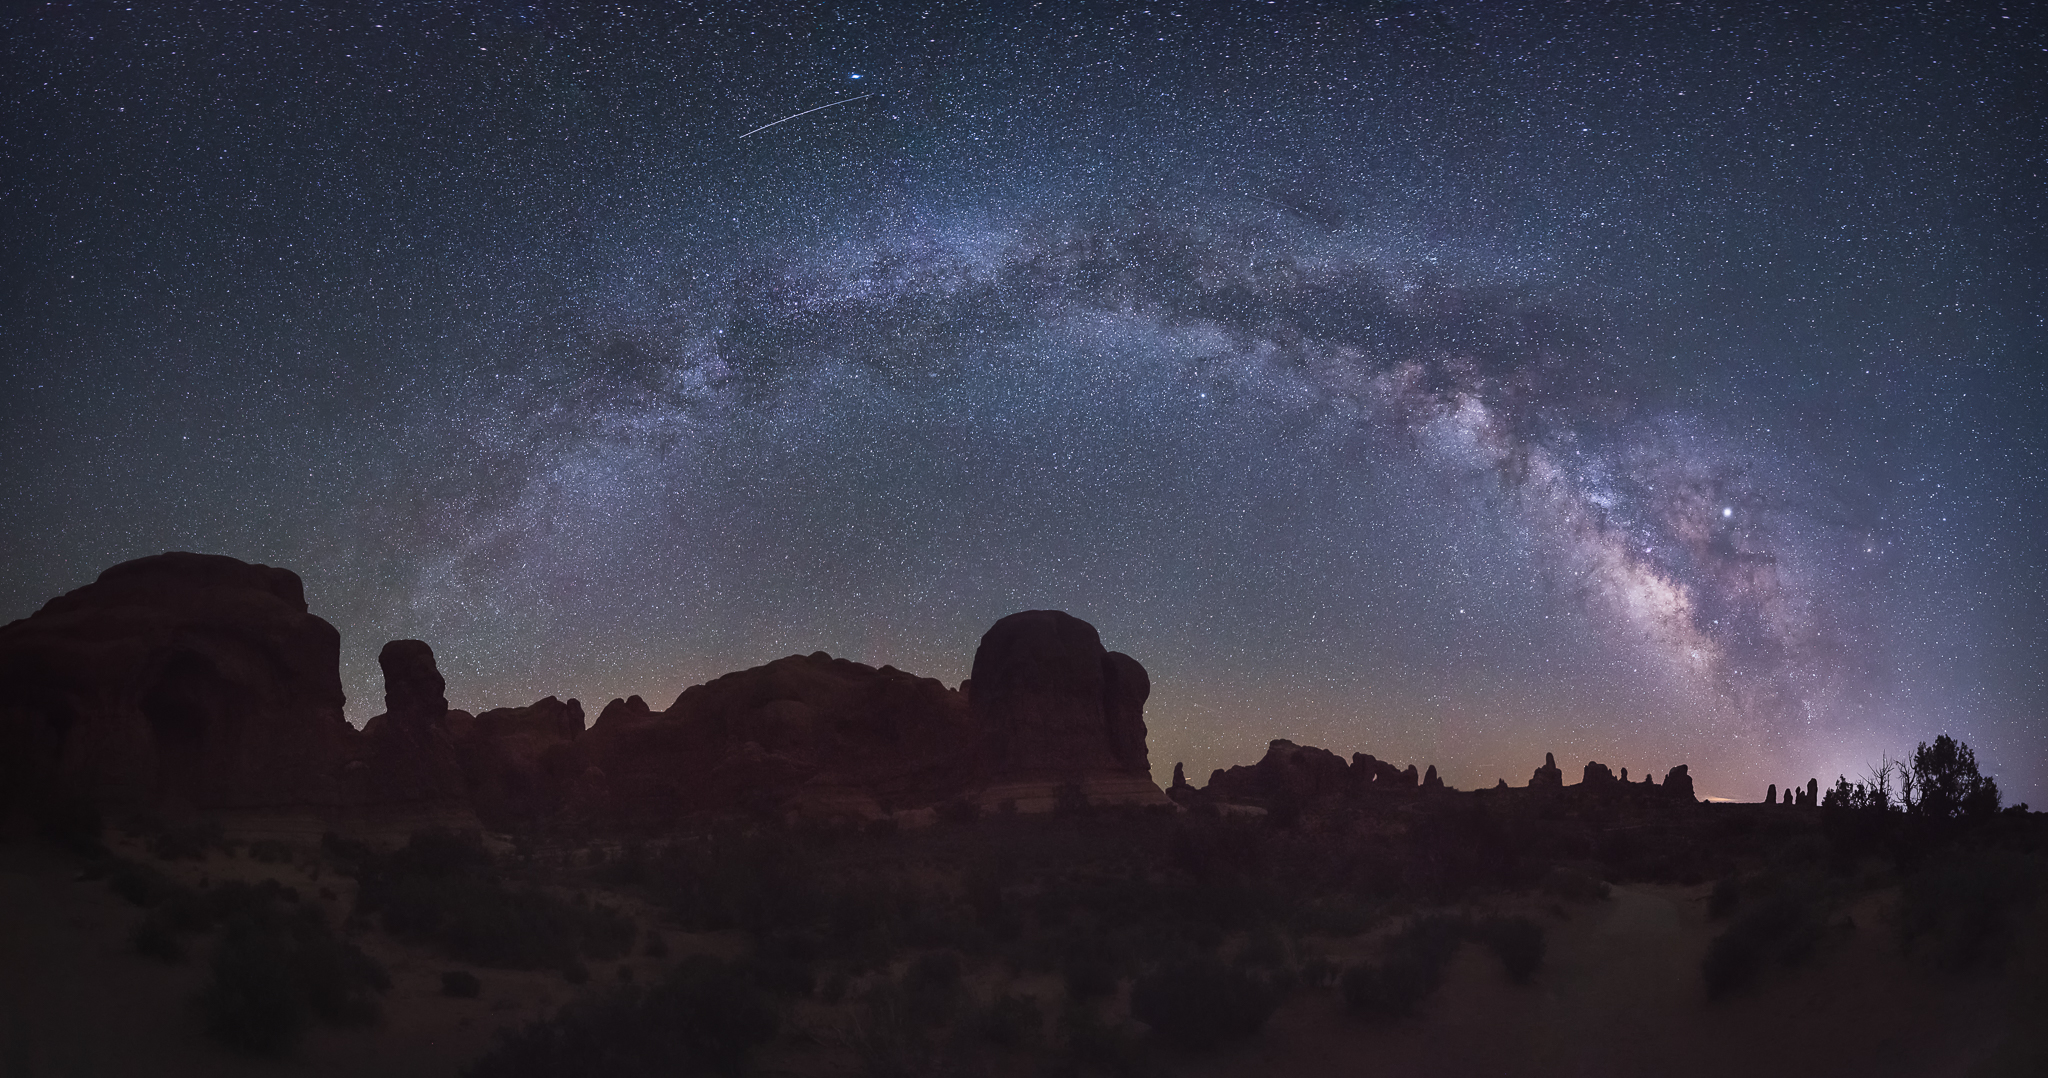
 This is a panorama of eight vertical images shot with a Nikon D810, Nikkor 14-24mm at 16mm, 15 seconds, f/2.8, ISO 10000.

Cosmo Atlantic Connection!

The infinite expanse of water, the great waves, and all the untold stories that come washing up on shore … to me it’s all majestic. It is this admiration that brought me closer to the shores of Atlantic in Maine. It was a perfect night at Boulder Beach in Acadia National Park. The air was thick with the spirits of dancing waves and the sky was filled with light from million stars. The Milky Way rose behind Otter Cliff and spread across the sky in all its glory. It evoked a sense of connection to something infinitely larger than life.

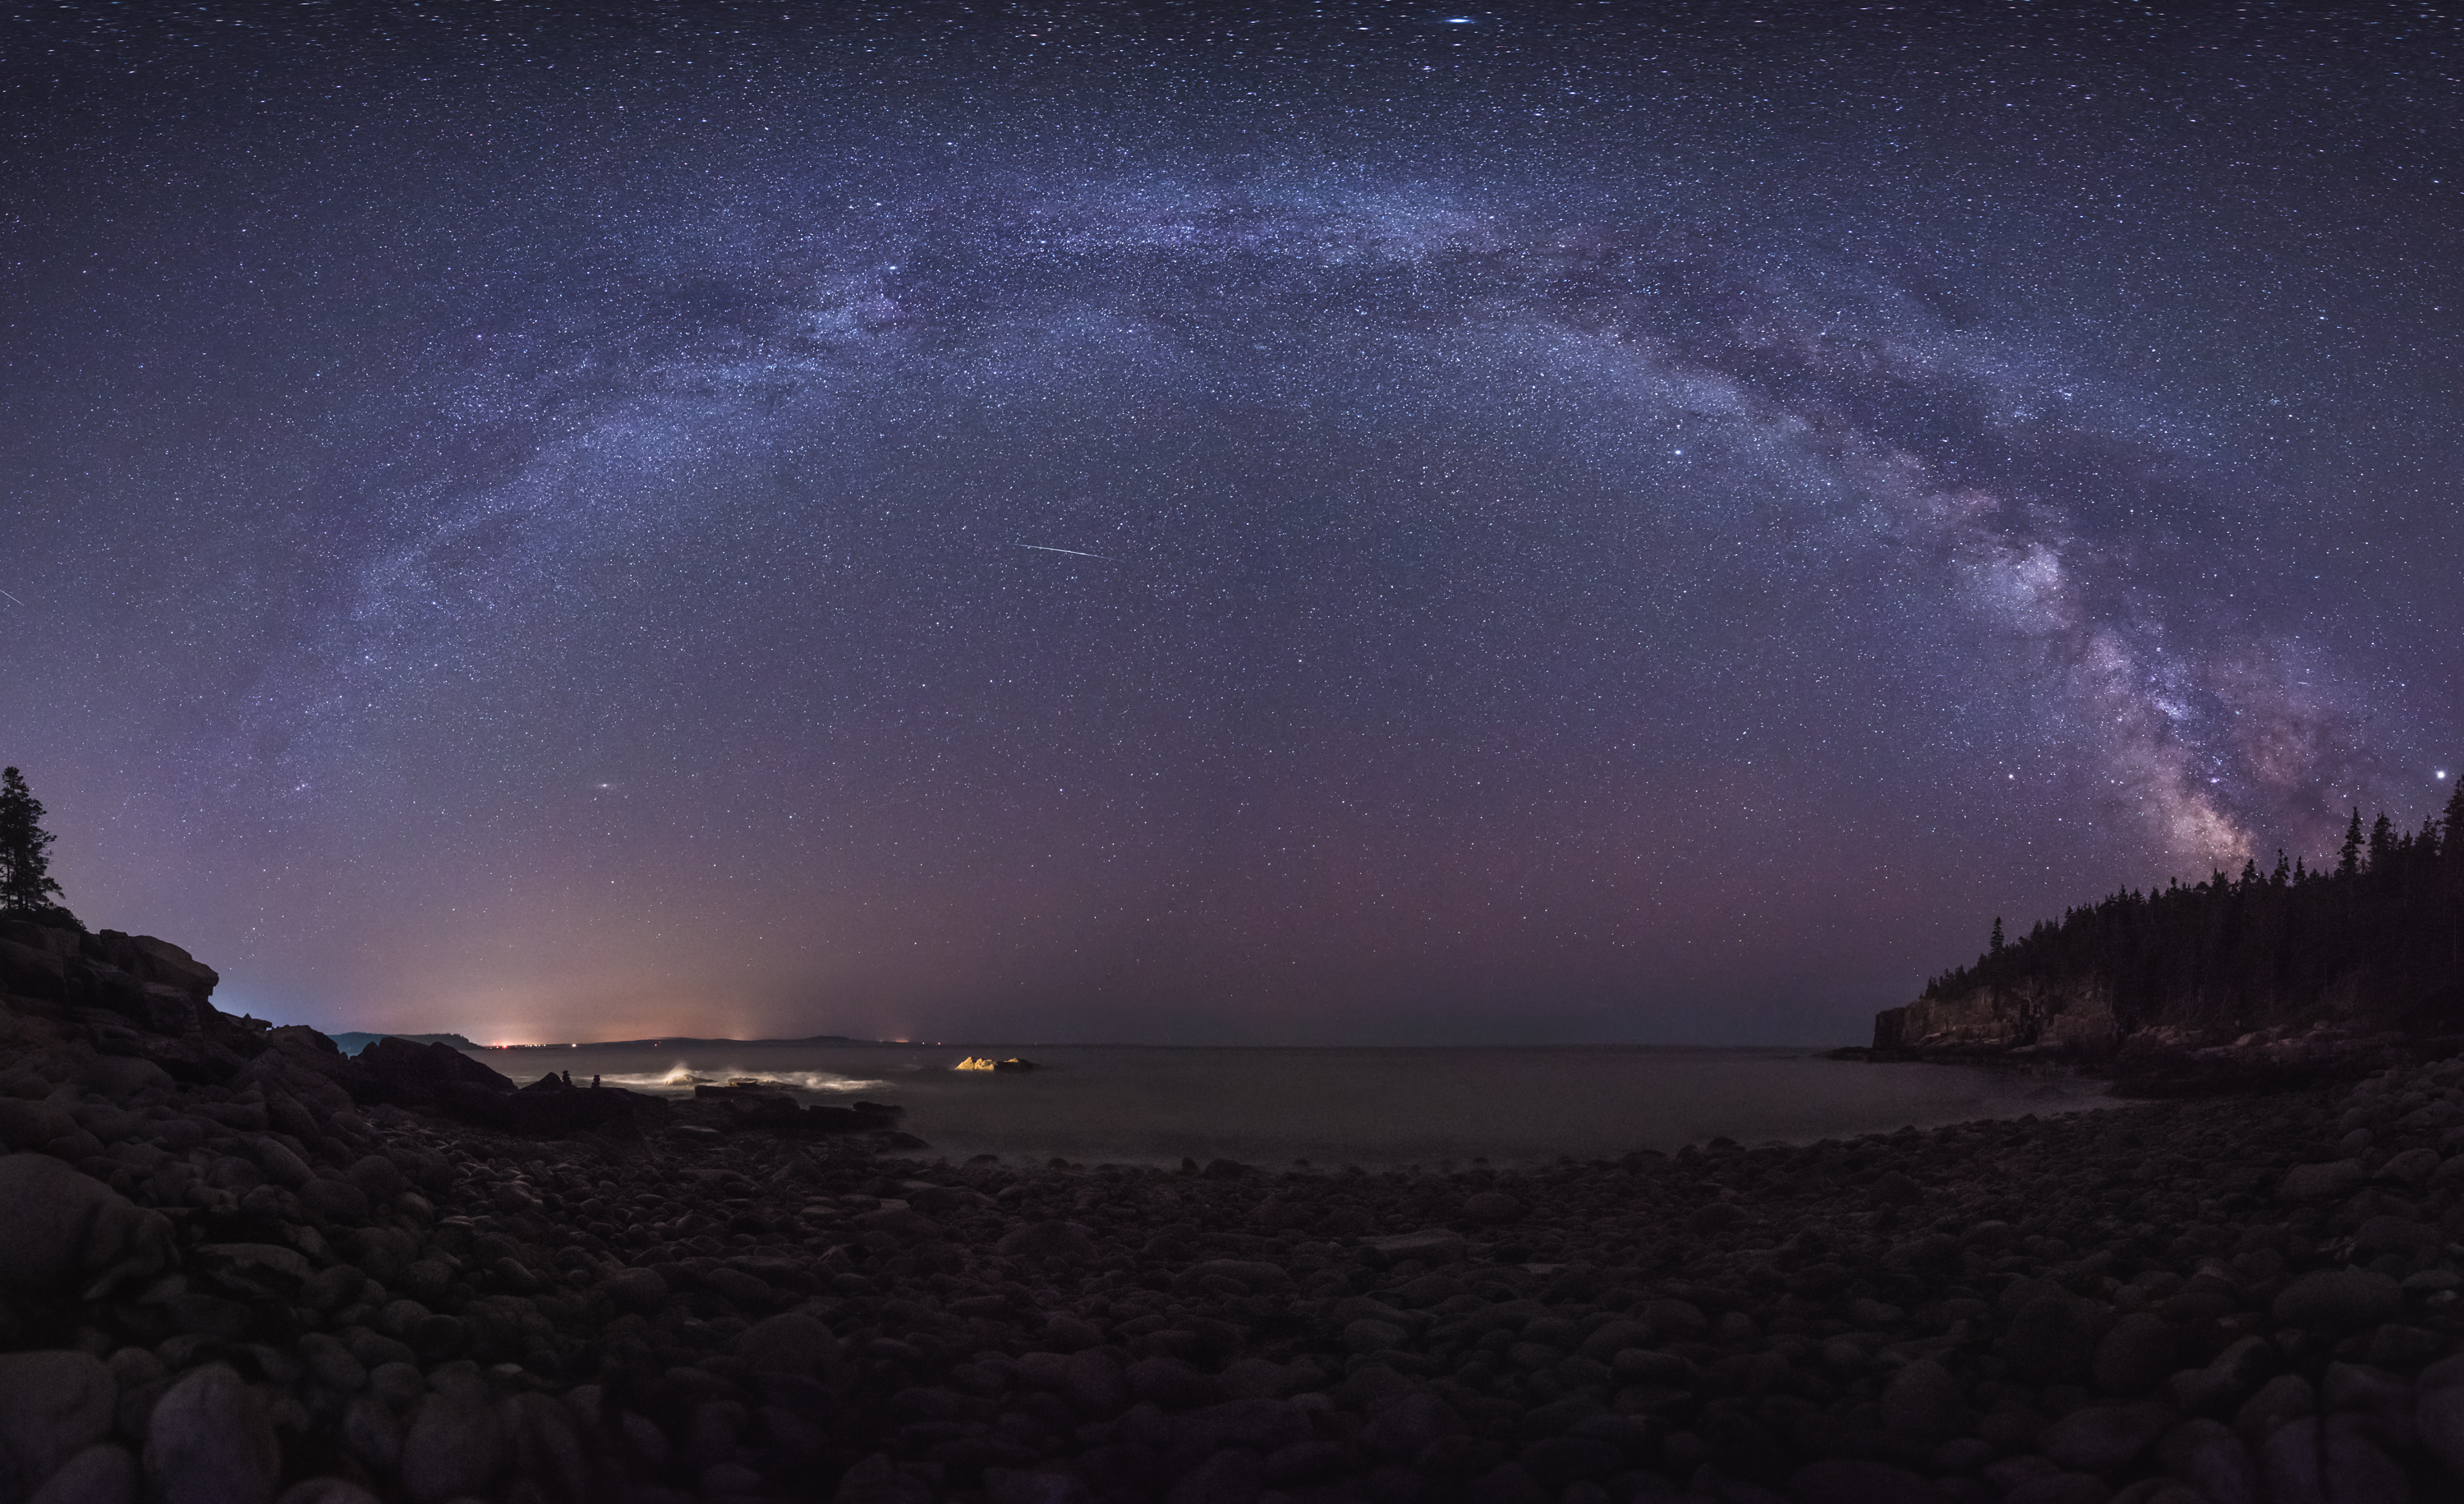
Multi-row panoramic stitch of 24 vertical images 15 seconds, f/2.8, ISO 10000.